Wednesday, 6 November 2024
How to build a pole shed that fits your budget and needs

Hey there, folks! Ready to tackle a DIY project that's both functional and satisfying? Building a pole barn is a fantastic way to add valuable space to your property without breaking the bank. Whether you need extra storage, a workshop, or even a charming guest house, a pole barn can be a surprisingly affordable and adaptable solution.
Let's dive in and explore how to build a pole barn that perfectly fits your needs and budget.
1. Planning is Key: The Foundation of Your Project
Before you even think about buying lumber, let's get our planning hats on. This is crucial to ensure you're building something that’s both functional and safe.
What's Your Purpose? Are you storing tools and equipment, housing livestock, or dreaming of a weekend getaway cabin? Knowing the intended use will dictate size, height, and features like windows and doors.
Size Matters: How much space do you need? Consider what you'll be storing or using the space for and don't underestimate the importance of adequate headroom.
Location, Location, Location: Choose a spot with good drainage and access, taking into account any existing utilities or trees that might affect the placement.
Building Codes and Permits: Don't forget about local building codes and permits. Research the requirements for your area to avoid any headaches down the road.
2. Budget Breakdown: From Dream to Reality
Building a pole barn can be surprisingly affordable, especially if you take a DIY approach. Here’s a breakdown of the typical costs to give you a starting point:
Pole Lumber: This is the heart of the structure, and prices can vary based on wood type and length. Expect to spend between $5-$10 per linear foot for pressure-treated poles.
Framing Lumber: You'll need lumber for the roof trusses, walls, and any interior framing. Prices fluctuate but expect to pay around $4-$8 per board foot.
Roofing Materials: Metal roofing is popular due to its durability and affordability. Calculate the square footage of your roof and factor in the cost of underlayment and flashing.
Siding and Windows: Siding can range from simple corrugated metal to more decorative options. Windows can add both light and style, but budget accordingly.
Foundation: Concrete piers or a gravel pad are common options for pole barn foundations. Costs depend on the size and complexity of your foundation.
Labor: If you're DIYing, your labor costs are minimal, but if you're hiring contractors, factor in those costs.
3. Choosing Your Construction Style: Pole vs. Post-Frame
You'll often hear the terms "pole barn" and "post-frame" used interchangeably. However, there are subtle differences:
Pole Barns: These are typically simpler structures with a single row of poles that support the roof and walls. They are often used for storage or agricultural purposes.
Post-Frame Barns: These structures typically have a double row of posts, offering more structural integrity and allowing for a larger span between supports. They can handle heavier loads and are suitable for larger buildings.
4. Building a Foundation for Success:
A strong foundation is critical for a long-lasting pole barn. Here are your main options:
Concrete Piers: These are sturdy and durable, providing a solid base for your poles. The depth and size of the piers will depend on your local soil conditions and building codes.
Gravel Pad: This is a simpler and less expensive option, suitable for lighter structures. You'll need a good layer of compacted gravel to provide stability.
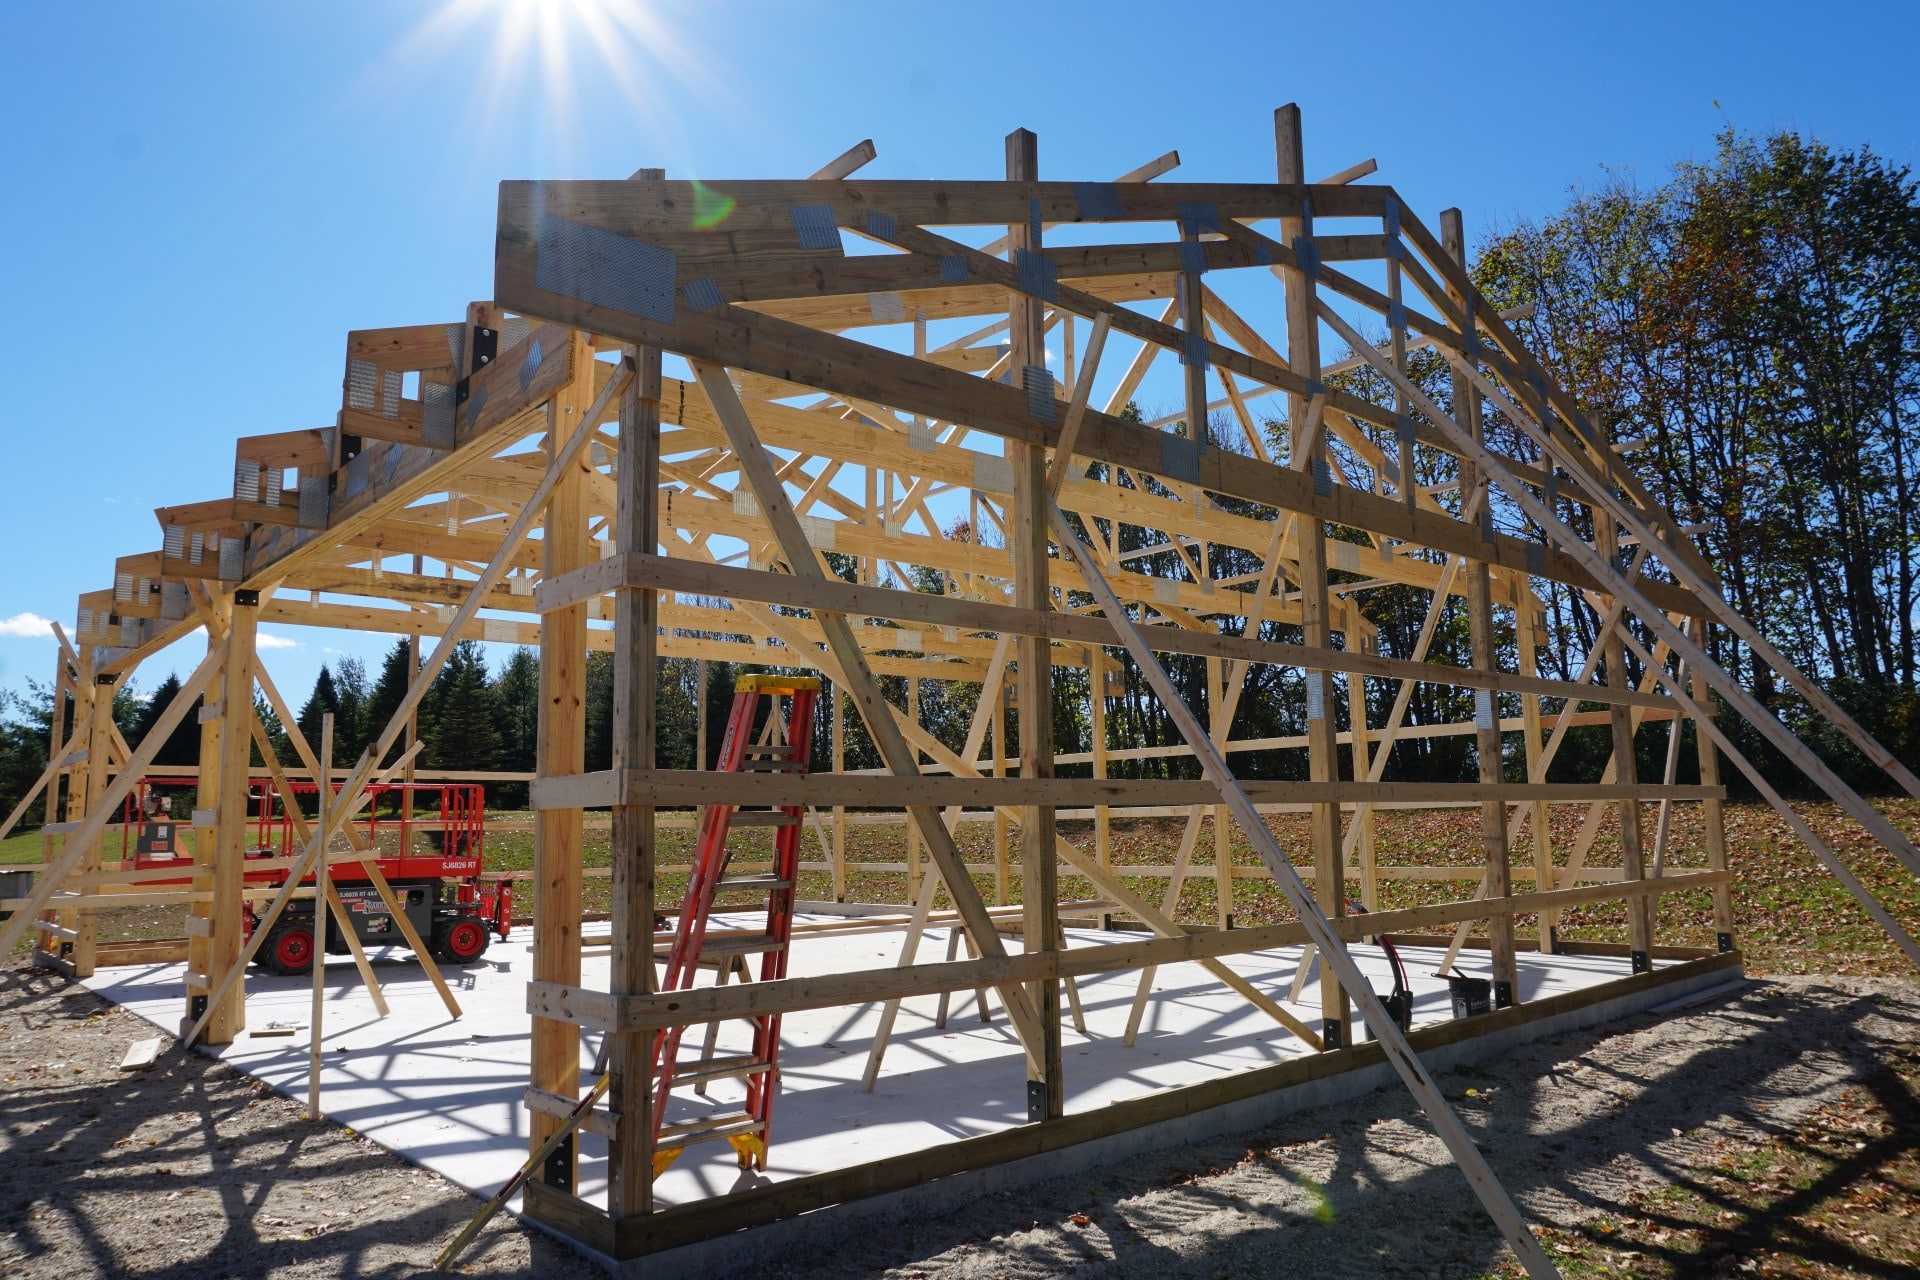
5. Erecting Your Poles: The Heart of the Structure
With your foundation in place, it's time to erect the poles, the backbone of your pole barn.
Spacing and Height: Calculate the spacing of your poles based on your chosen style and the weight they need to support. The height should be determined by your needs and local codes.
Concrete or Anchor Bolts: Secure the poles to your foundation using either concrete poured around the base or anchor bolts embedded in the concrete piers.
Leveling and Plumb: Ensure your poles are perfectly level and plumb for a structurally sound building.
6. Building the Roof and Walls: Enclosing Your Space
The roof and walls create the shell of your pole barn.
Roof Trusses: These are prefabricated structures that support the roof. Choose a design that meets the span requirements of your building and any local snow loads.
Roofing: Metal roofing is a popular choice for pole barns due to its durability, affordability, and low maintenance.
Wall Framing: Use lumber to create a framework for the walls, then add siding and insulation as desired.
7. Adding Finishing Touches: Functionality and Style
Now it's time to add the finishing touches that make your pole barn unique.
Doors and Windows: Choose doors and windows that fit your needs and style. Consider sliding doors for easy access and windows for natural light.
Interior Finishing: Add insulation for warmth and energy efficiency. You can also choose a floor covering, such as concrete or wood, and paint the walls to create a finished look.
8. Tips for Success:
Research Local Codes: Ensure your pole barn meets local building codes and regulations.
Safety First: Use proper safety gear and follow safety precautions when working with tools and equipment.
Ask for Help: Don't be afraid to ask for help from friends or family, or hire professional help for specific tasks if needed.
Enjoy the Process: Building a pole barn is a rewarding experience, so take your time and enjoy the process!
Remember: Building a pole barn is a significant project, but with careful planning, research, and a little elbow grease, you can create a valuable asset for your property. Good luck!
No comments:
Post a Comment
Note: only a member of this blog may post a comment.