Wednesday, 6 November 2024
How to build a cheap 8x10 shed in just a few days

Alright, so you want a shed. Maybe you need a place to store your tools, bikes, garden supplies, or just a quiet space to get away from it all. Whatever your reason, building your own shed can be a really rewarding project, especially if you're looking for a budget-friendly solution.
I'm no professional builder, but I've tackled a few projects around my own house, and building a shed was definitely one of the most satisfying. And guess what? You can do it too, even if you're a DIY newbie.
First Things First: The Planning Stage
Before you jump into the construction frenzy, take a deep breath and let's get organized. Here's a checklist to make sure you're on the right track:
1. Permit Check: Check with your local building department to see if you need a permit for your shed. It's better to be safe than sorry!
2. Location, Location, Location: Choose a spot for your shed that's relatively level and accessible for your tools and materials. Don't forget to consider drainage and sun exposure.
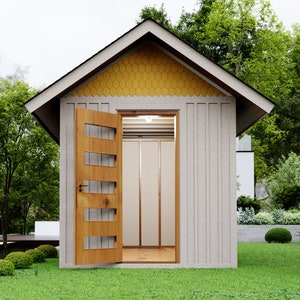
3. Design Decisions: Decide on the size and style of your shed. A simple 8x10 shed is a great starting point and can be built for under $1000. You can find plenty of free plans online, or even customize your own.
4. Material Madness: You'll need lumber, plywood, roofing material, fasteners, and doors and windows. Shop around for the best deals and consider using recycled or salvaged materials for a more budget-friendly build.
Tools of the Trade: What You'll Need
Gather your tools before you start cutting. You'll need the basics for any woodworking project:
Measuring tape: A must-have for ensuring everything is accurate.
Level: Keeps things straight and square.
Circular saw: For cutting lumber to length.
Hammer: For pounding nails and driving screws.
Drill: For pre-drilling holes and driving screws with ease.
Screwdriver set: Essential for working with screws.
Safety Glasses: Protect your eyes from flying debris.
Gloves: Keep your hands safe from splinters and cuts.
The Foundation: A Stable Base
Now, let's talk about the foundation. You can choose from several options depending on your budget and skill level:
Concrete Slab: This is the most durable option but requires some experience. You'll need to pour concrete and let it cure for at least a week.
Concrete Blocks: A budget-friendly alternative that offers good stability. You can build a simple block foundation with a level surface.
Pressure-Treated Skirts: This option is great for level ground and is easier to assemble. Simply screw the pressure-treated lumber into the ground, creating a frame for your shed.
Framing: The Bones of Your Shed
Once your foundation is in place, you're ready to start framing. This is the part where you start to see your shed come to life.
1. Building the Floor: Lay down your floor joists on the foundation and secure them to the pressure-treated lumber. Use 2x6 lumber for additional strength.
2. Erecting the Walls: Cut your wall studs and assemble them into rectangular frames. Make sure the studs are vertical and properly spaced.
3. Roof Framing: Use 2x4 lumber to build the roof trusses. You can either build them yourself or purchase prefabricated trusses for a faster build.
Sheathing: Covering the Frame
Next, you'll sheath the walls and roof with plywood. This will give your shed structure and provide a solid base for the siding and roofing.
1. Wall Sheathing: Attach the plywood to the wall frames using screws. Make sure the sheets are flush and even.
2. Roof Sheathing: Apply plywood to the roof trusses, ensuring a secure and watertight surface.
Siding and Roofing: Adding Style and Protection
With the sheathing complete, it's time to start adding the finishing touches.
1. Siding: Choose from a variety of materials like vinyl, wood, or metal siding. Vinyl siding is easy to install and comes in many colors.
2. Roofing: You can use asphalt shingles, metal roofing, or even recycled materials like old tires for a unique look. Make sure you choose a material that's appropriate for your climate and budget.
Doors and Windows: Finishing Touches
Now comes the fun part: installing your doors and windows. This is where you can add your personal style and create a space that feels like yours.
1. Doors: Select a pre-hung door that fits the opening you created in your shed.
2. Windows: Choose windows that match your style and budget. You can even use salvaged windows for a rustic look.
Painting or Staining: Adding a Personal Touch
With the basics complete, you can add some color and personality to your shed.
1. Painting: Choose a durable exterior paint that will withstand the elements.
2. Staining: Staining your shed with a natural wood stain will enhance the beauty of the wood and provide protection.
Congratulations, You Did It!
And there you have it! You've built your own shed, saving yourself money and gaining valuable skills along the way.
Don't Forget:
Safety First: Wear safety glasses and gloves throughout the project.
Take Your Time: There's no rush. Focus on quality over speed.
Ask for Help: Don't be afraid to ask for help from friends or family if you need it.
Enjoy the Process: Building your own shed can be a rewarding experience. Take pride in your hard work and enjoy the fruits of your labor!
Now, go get building!
No comments:
Post a Comment
Note: only a member of this blog may post a comment.