Thursday, 21 November 2024
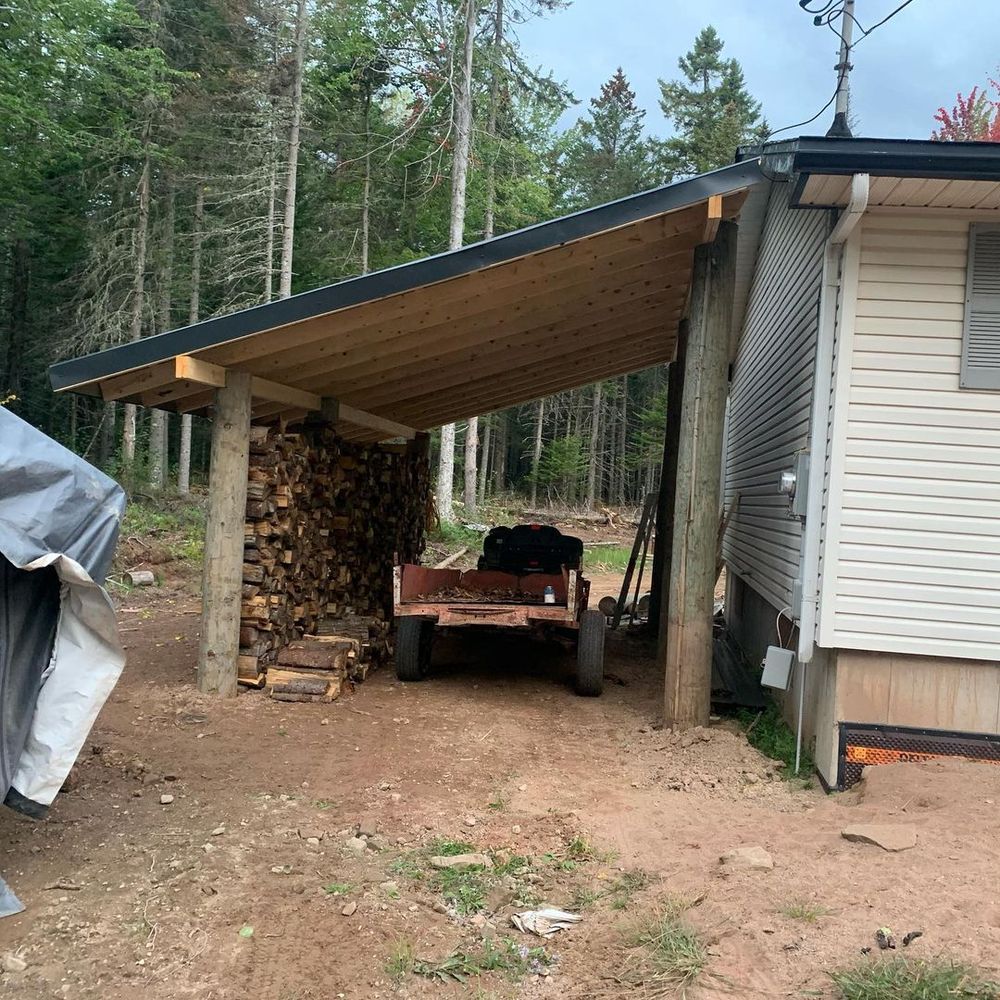
How to Build a Lean-To Shed: A Budget-Friendly Outdoor Project

How to Build a Lean-To Shed: A Budget-Friendly Outdoor Project
Dreaming of extra storage space without breaking the bank? A lean-to shed is the perfect solution! This simple structure, attached to an existing wall (like your house or garage), offers ample storage while minimizing material costs and construction complexity. This guide will walk you through building your own lean-to shed, maximizing value and minimizing expense. Get ready to transform your outdoor space with this rewarding DIY project!
Planning Your Lean-To Shed
Before you grab your tools, meticulous planning is key. First, determine the desired dimensions of your shed. Consider the available space against your existing wall and the storage needs you aim to fulfill. Sketch a simple plan, noting the height, width, and depth. This plan will guide your material calculations and construction process. Next, obtain the necessary permits from your local council. This step may vary depending on your location and the size of the shed, but it’s crucial to avoid potential legal issues down the line. Finally, gather your materials list, carefully considering cost-effective options. Reclaimed lumber or discounted materials from local suppliers can significantly reduce the overall expense.
Gathering Your Materials and Tools
Building a lean-to shed requires a combination of lumber, fasteners, and other essential supplies. You'll need pressure-treated lumber for the base and frame to withstand the elements. Consider using cheaper, readily available softwood for the walls and roofing, as these areas are typically less exposed to harsh weather. For roofing, asphalt shingles are a budget-friendly and effective choice. Don't forget about concrete screws or post anchors for securing the base to the ground and the shed to your existing wall. Here’s a sample list:
- Pressure-treated 4x4 posts for the base
- Pressure-treated 2x4s for the frame and walls
- Plywood or OSB for sheathing
- Asphalt shingles for roofing
- Concrete screws or post anchors
- Nails, screws, and other fasteners
- Building wrap or tar paper
- Exterior paint or sealant (optional)
In terms of tools, ensure you have a measuring tape, level, saw (circular saw or hand saw), drill, hammer, and a shovel for digging post holes. Having a helper will significantly speed up the process, especially during more challenging construction steps.
Constructing the Frame and Base
Building the Base
Begin by preparing the ground where the shed will sit. Level the area, ensuring a solid and stable foundation. Dig holes for your 4x4 posts, ensuring they are set deep enough to provide adequate support. Secure the posts using concrete, allowing sufficient curing time for the concrete to fully set before proceeding. Once set, attach the base frame using pressure-treated 2x4s, creating a sturdy rectangular structure.
Erecting the Frame
Next, construct the main frame of the lean-to. This involves attaching more 2x4s to the base frame to form the vertical supports and rafters for the roof. Ensure that the frame is perfectly square and plumb, utilizing a level at each stage. Precise measurements and careful construction will ensure a stable and structurally sound shed.
Adding Sheathing
Once the frame is complete, add sheathing to the walls. Plywood or OSB sheeting provides a solid base for the exterior covering. Secure the sheathing using nails or screws, ensuring a snug fit. Consider adding building wrap or tar paper to provide an extra layer of protection against the elements. Remember, this step improves the longevity of your shed significantly, so take your time and do it right.
Roofing and Finishing Touches
With the walls complete, it’s time for the roof. Install the roofing material according to the manufacturer’s instructions. Asphalt shingles are relatively easy to install, but always follow safety precautions when working at heights. Properly overlapping the shingles is essential to ensure water-tightness. Once the roof is complete, add any finishing touches, such as painting the exterior or adding a door. These are optional but greatly enhance the aesthetics and longevity of your lean-to shed.
Final Considerations
Remember that building a lean-to shed is a rewarding but potentially physically demanding project. Take breaks when needed, and don’t hesitate to enlist help from friends or family. By following these steps and utilizing cost-effective materials, you can build a functional and attractive lean-to shed without exceeding your budget. Enjoy your new storage space!
No comments:
Post a Comment
Note: only a member of this blog may post a comment.